[Video transcript]
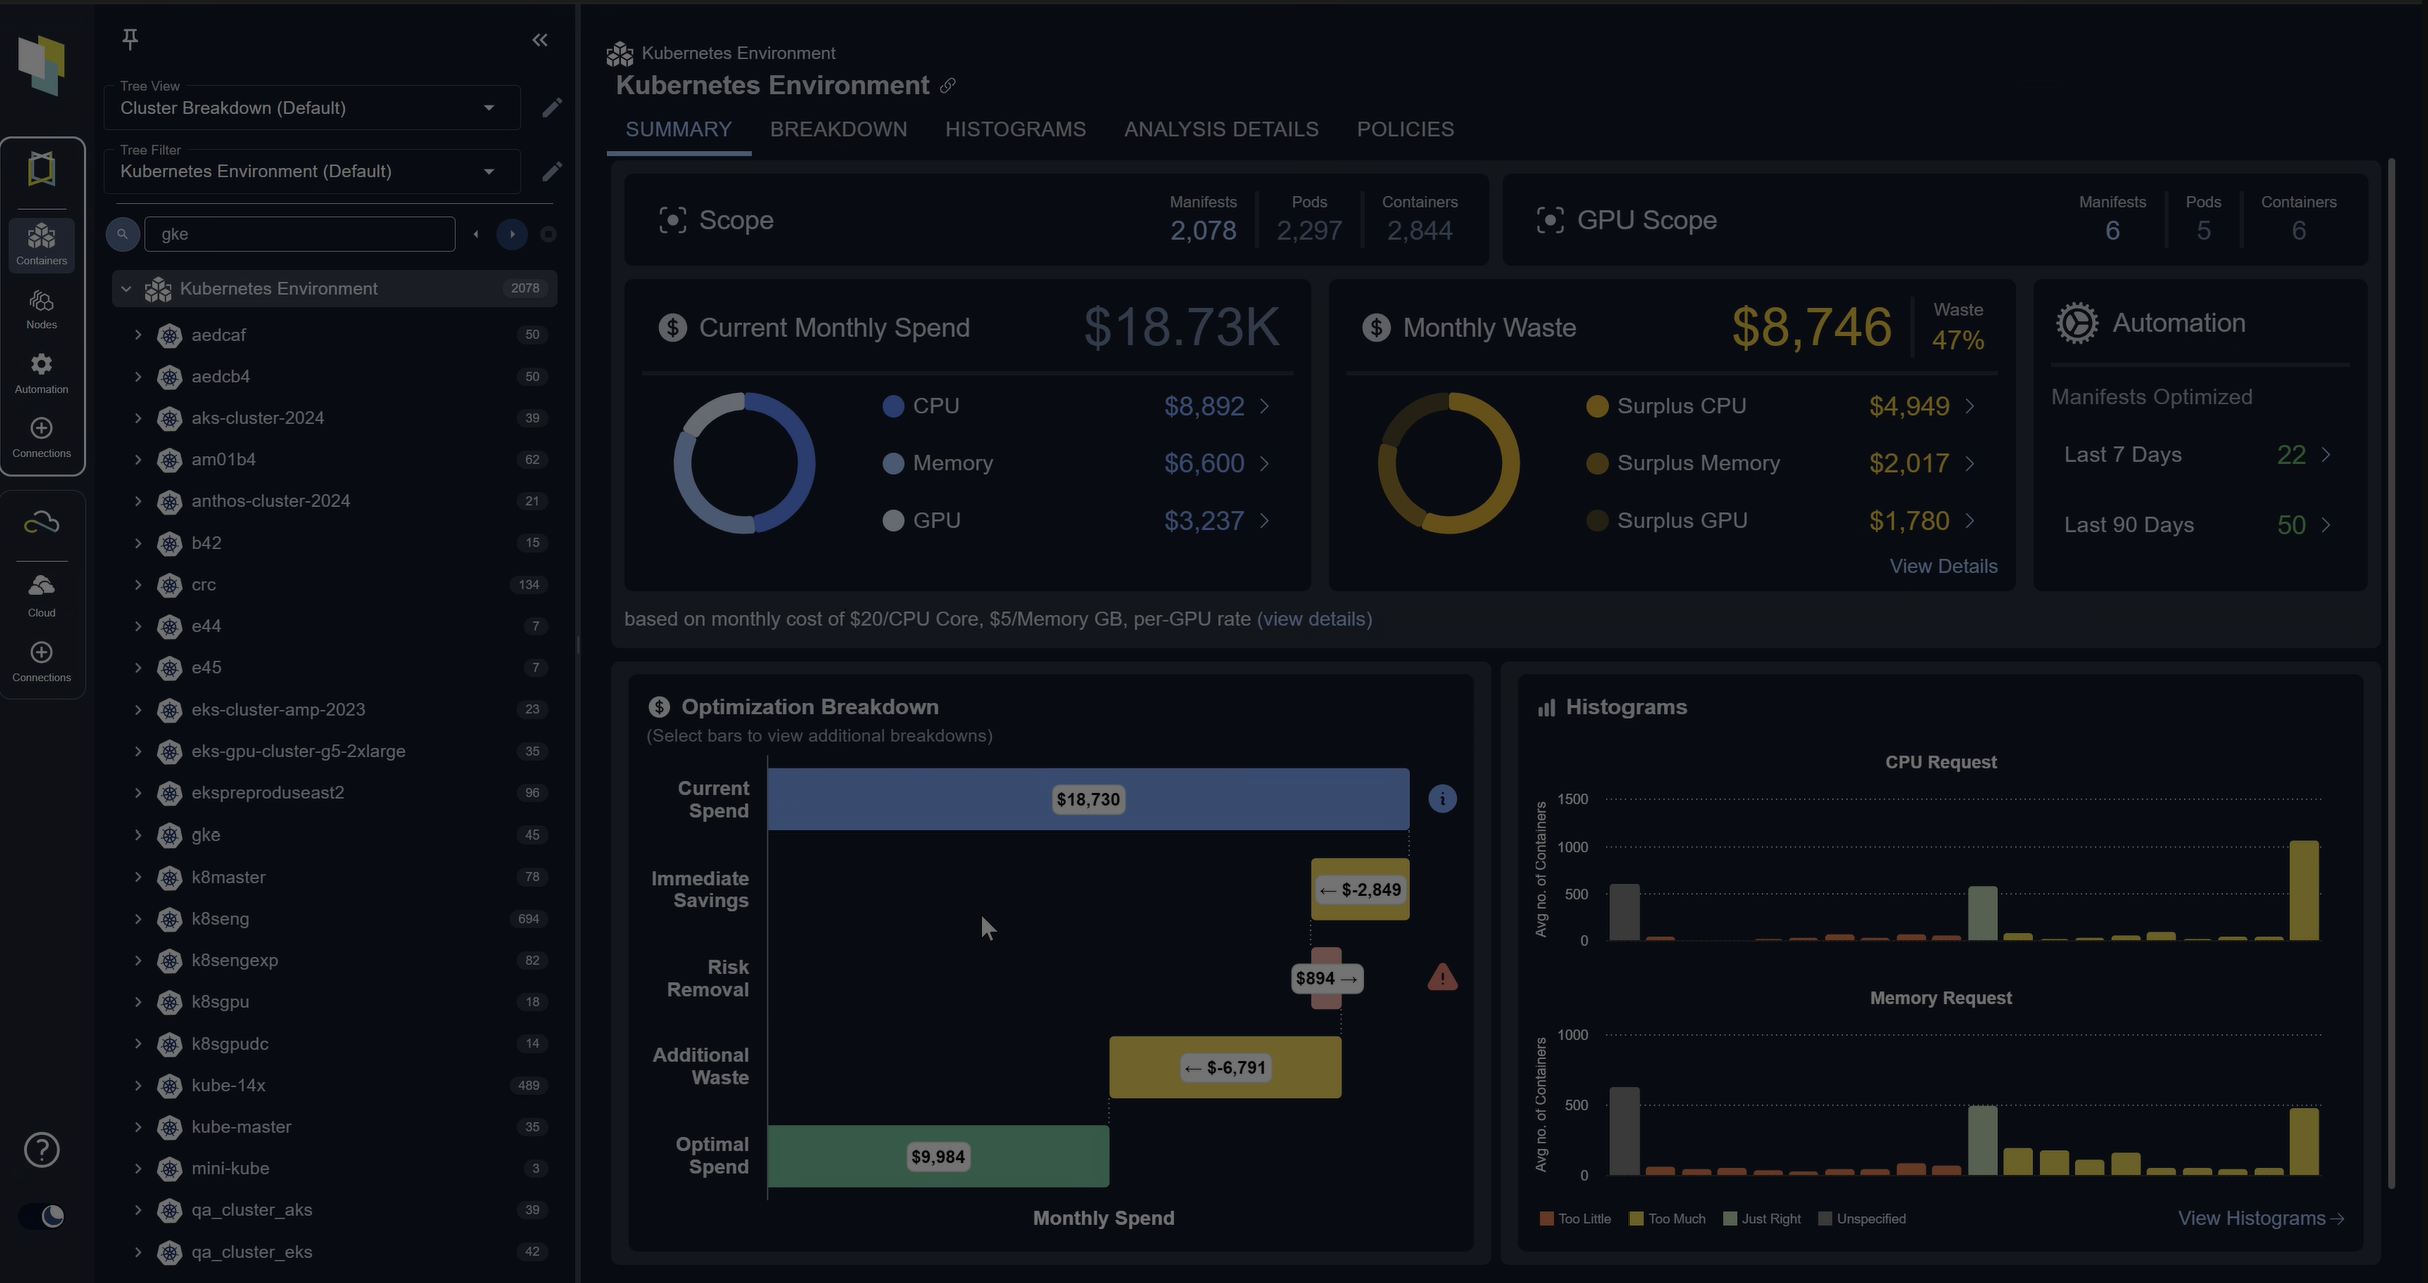
This is the Kubex main overview dashboard. And what we’re looking at is the results of automating the optimization in a cluster. And let me explain what we’re looking at.
Across the top is the inventory information. How many pods and containers are running this environment? How many GPUs? In this case, there are no GPUs in this particular cluster. But the curves are really where the story is being told. And if you look at the curves, that’s the CPU and memory resources being consumed over time.
And the gray line. Is the amount of resources being deployed that’s in the nodes, the amount of resources in nodes. The orange line is the amount of aggregate requested resources by all the containers in this cluster. And the blue line is the actual utilization of those containers.
And if you look at the far left of both of these curves, what you see is that there’s some big gaps there. So the orange line is quite far above the blue line. We see that a lot when containers are oversized. So one of the first things we wanna do is fix that because if the container requests are really high. What will happen is the node autoscaler will have to run a lot of hardware to meet all the requests, and that’s the gray line. So that gray line is pretty high.
The gap between the orange and the gray, that typically means that there’s some node inefficiency or autoscaling inefficiency. Maybe you’re running on the wrong node types. Maybe you should be on memory optimized. Maybe you should do some bin packing or other types of consolidation.
But what you see here is that there’s a point where the orange curve starts coming down, and that’s when automation is turned on Cubic. What that’s doing is QBE is constantly analyzing all the workload patterns of all the containers coming up with better requests and limits, and then automating them and making them.
As you move to the right, you see the orange line is much more in line with the blue. So we basically cut out all that excess requests. We’re not asking for way more resources that we need. And as a result, that gray line also comes down and in node auto scalers, like, carpenter or, or the OpenShift. No autoscaler, they will automatically consolidate as the requests are brought down.
There’s a really nice feedback loop here. We’ll automatically start saving money if you fix the requests and limits. And at the bottom right here, what we can see is there’s actually a, a lot of detail on the automation.
If you wanna know exactly what happens, I can open up this name space and open up a container down here near the bottom and see the automation occurring. So what’s happening is, in this case, the CPU request was brought up. The CP request was actually lower than utilization, which is the blue line. So there’s a bit of risk here. So in this case, for this container, we brought the request up for CPU and the, and the limit memory request and limit were brought down and that’s gonna save money.
And it’s constantly doing this across all the containers that you’ve enabled automation for. In this case, the whole cluster is enabled. It has a mutating emission controller, so it can do it. In earlier versions of Kubernetes or after 1 3, 3, we also do inplace resizing. So it can be done very seamlessly.
The idea is that you, you deploy Kubex, you flip on automation, and it will bring that orange line down and start saving you a lot of money and also gets rid of risks. So you’ll see here that my container risks have gone down to zero.
So we are also optimizing the limits, so there’s no out of memory kills and no throttling occurring, and you can do this across your clusters. And again, save money on a broad scale and also de-risk the environments.